Showing posts with label DIY. Show all posts

Sunday, 2 June 2013

Teddy Bear


I made a wonky teddy for my new nephew Greyson.

Wednesday, 30 January 2013

Match Jar Tutorial


This simple project was inspired by a photo on my friend Jutta's blog. You see, until very recently, my matches used to live in my knife drawer. Don't ask me why I thought that was the most appropriate place to keep them. Especially as I am not the world's most coordinated person, and was forever risking cutting my fingers when I needed to light a candle! So I figured that keeping the matches in a jar on the counter instead would be much safer.

I was debating whether or not I could call this a tutorial, because it really is super-simple to do. Here's what y'all will need:

- glass jar with lid
- scissors
- pretty paper
- glue
- a match box
- double-sided tape
- matches

Cut out a paper circle to fit the top of the lid. For this purpose you can place a piece of scrap paper on top of the lid and just trace its shape with a pencil. Then cut that circle out and use it as a template. Place the template on your pretty paper (I used a vintage wallpaper sample), trace again and cut out. Glue the paper on top of the lid. Just as an aside: I debated spray-painting the lids before making these jars, but as I liked the goldy colour and am a lazy person by nature, I decided against it. Feel free to spray-paint away!


Now, unless you use strike-anywhere matches, which you can (wait for it!) strike anywhere, you will need a surface to ignite your match on. Cut the side with the striking pad off the matchbox and use double-sided tape to attach it to the bottom of the jar, as shown below. You may have to cut it to size if your jar is small. Then fill your jar with matches, screw the lid tight and feel smug. That's what I did, anyway. I made a jar to keep in the kitchen and another little one for near the fireplace, and my fear of knife wounds is now a thing of the past!


Photobucket

© Text & Photos - Annika - All The Live Long Day (unless otherwise stated).


Or so she says

Monday, 21 January 2013

Pine Cones


I love picking up bits of nature when I'm on a walk. I love looking at the different shapes of things, their intricacy and geometry is so close to perfection. I have a particular thing for pine cones. I think they are beautiful. I have so many at home and when I was bored on the weekend, I made some into wall hangings.

Do not ask me if there is a meaning behind these, or why they look the way they look. I just took some pine cones and branches and embroidery floss and this is what came out. I felt a bit silly at first, wrapping bits of thread around a twig, but in the end I really enjoyed the process of creating something. I am quite pleased with my little pieces of primitive art.


Photobucket

© Text & Photos - Annika - All The Live Long Day (unless otherwise stated).

Saturday, 1 September 2012

Panda Pencil Case


So, I handmade this panda pencil case for my "niece" Clara. (She's my inverted-comma-niece because we are not blood-related, but she's my sister-from-another-mister's daughter). I used this tutorial for help with assembling the case and made the rest of the design up completely. Which is incidentally how I live most of my life...

It's a present for Clara's first day of school, which we Germans celebrate big. I have been informed by a reliable source that "niece" is currently panda-crazy. 

Well, guess what, I am now panda-crazy, too. Just in a completely different way. Because starting to make something with ears and eyes and a zipper and then having your sewing machine give up the ghost in the first quarter of that process does drive you somewhat bonkers... But for a hand-sewn first attempt, it ain't too terribly bad. Even if I say so myself.

Happy First Day Of School, Clara!!!
 

P.S.: Sorry about the cat hair....

Photobucket
 
© Text & Photos - Annika - All The Live Long Day (unless otherwise stated).
 

Wednesday, 30 May 2012

Alright, then.


Seeing as that is the only bit of blue left in the London sky at the moment, I thought I might as well give you those updates on my projects I was talking about yesterday (when I said I did not feel like blogging...). I will just assume that me deciding to wash our pillows and duvet today is just coincidental with the weather deciding to give us some rain. Anything else is just too messed up to think about it! Well, at least I got almost everything dry before the first drops fell.

So, here is update number one, for le sky scarf:

I have arranged all my balls of wool neatly in cups and glasses on a tray. So far, everything has stayed tangle-free. It also lets me easily store the project on the living room cabinet, well out of the way of my darling cats. 

You can see that since I started at the beginning of May, the weather has been pretty grey, except for the last glorious week and a half. I have not yet used any of the deep summer blue, but fortunately also none of the thunderstorm grey. Although today I might have to...

Update number two is for the wedding quilt:

I'm done with cutting out the squares. All 270 of them! Suddenly this project is starting to seem a bit daunting again. But it's been fun so far, and I can see the finished quilt vaguely in my mind. Onwards and upwards, ho! I believe it can be achieved.

Which leaves update number three, my lovely craft room:

The floor turned out beautiful! Whenever I go upstairs now, I need to factor in about 10 minutes of staring at the light wood and the pretty wallpaper. I have not moved in yet, before that happens I will need a trip to Ikea and the hardware store to get supplies to build a desk and shelves. This won't happen until after we're back from Germany. But that's okay, as I have been using the room as a workshop for refurbishing a little cabinet that is going to go next to my side of the bed. Yay! That's another project I will hopefully be able to show you soon!

Photobucket

© Text & Photos - Annika - All The Live Long Day (unless otherwise stated).

lollipops

Thursday, 24 May 2012

A Room Of My Own


We all know that for a woman's well-being and mental maintenance it is important she have a room of her own (see Virginia Woolf). I might be slightly antagonizing the underlying feminist idea by having my room be a craft haven, but I don't care! Over the last few weeks, the little box room in my house has been cleared and completely renovated!

I had been looking forward to this, but after an initial bout of DIY madness when we first moved into our home 5 years ago, Marco and I had grown tired of spending our weekends at the home improvement store or wielding tools, so this room ended up the last largely unfinished area and was abused as storage. I did have a desk in there, but because I did not feel a lot of love for this space yet, it was always really, really untidy. I do not know how I deserve Marco's generosity, because unlike me and my domain, he will not have a boys' room. But I guess because I will spend so much time in the craft room once it is finished, the rest of the house will pretty much be his!

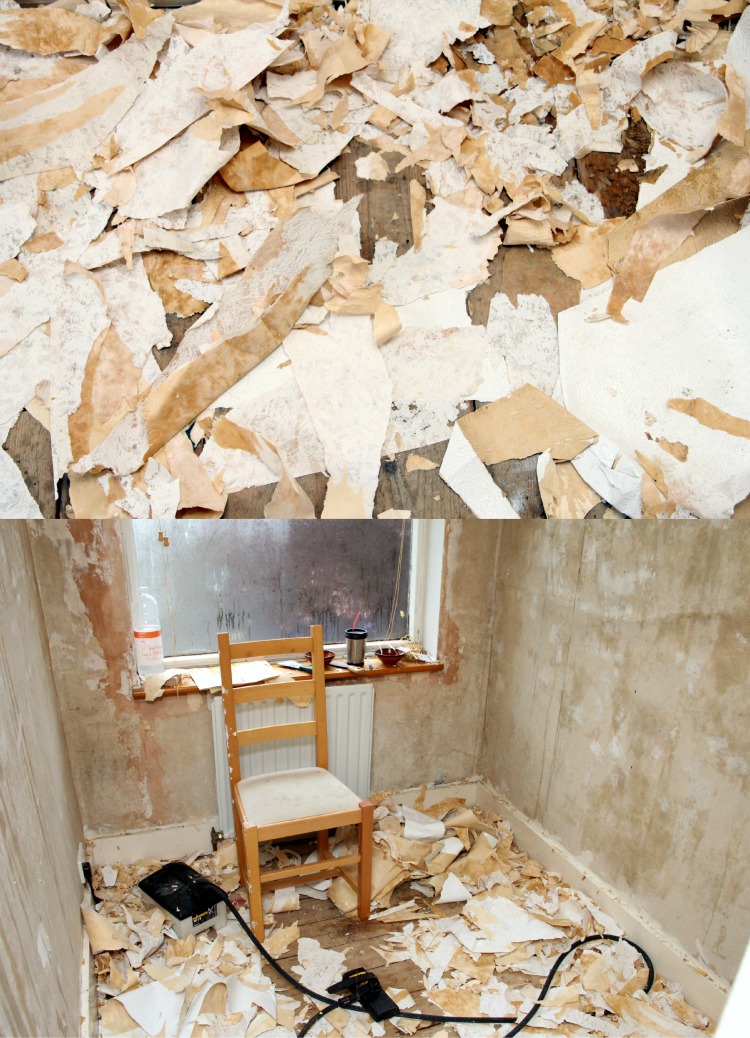
So the first daunting task was to establish whether or not the floor was still there, and clearing out the mess. I salvaged anything that was useful and stored it in the guest room (I know I just shifted the problem to another space, but it will be dealt with once the craft room is ready for me to move in!). Anything else filled one big garbage bag.

It was an amazing improvement already to be able to move around freely without stepping on stuff or boxes collapsing on top of you!

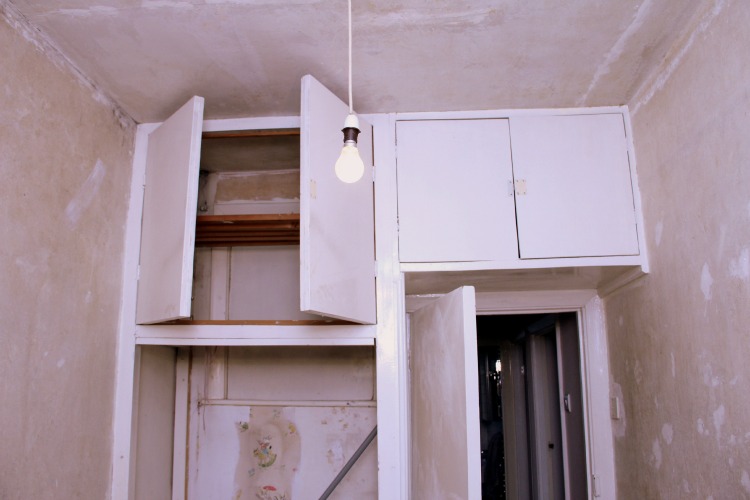
The cupboard in this room used to hold the massive pleistocene boiler before we replaced it with a newer model when our kitchen and bathroom were being done. Behind the boiler was this amazing vintage kids' wallpaper with bunnies and ducks partaking in all kinds of pastimes. The wallpaper looks like it was handprinted. Even though I stripped the rest of the room of its textured vinyl, this remnant of another time will stay!

Mae is not yet sure what she thinks of the renos, but Missy quickly discovered that she can jump out the open window onto the roof over our front door, from where she can watch the going-ons in our street. It took her slightly longer to figure out how to get back in, but she has mastered that move too now. But there may have been an attempted rescue mission involving a ladder before she finally switched her brain on....

It did not take very long to strip the walls, mostly due to the fantastic steamer we have. And in addition to getting rid of the textured paper on the walls, it felt like spending a few hours in a Turkish bath!


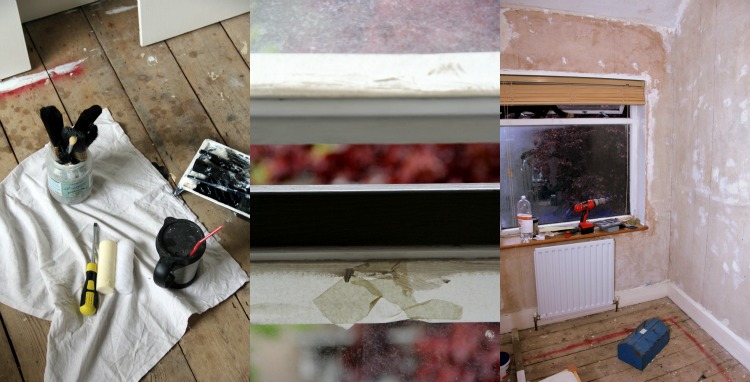
After the walls were bare, I sanded and painted all the wooden surfaces, including the window, the skirting boards and the built-in cupboards. It was ever so gratifying to look at all the pristine white after the job was done.


Then we put wallpaper on again. I picked a really lush design of branches and cherry blossoms on a black background. It's very boudoir, but looks amazing. I bought the wallpaper a long while back when it was on sale, because I just loved the pattern, and that caused a bit of a panic when we realized that we were about half a length short on the final piece! Predictably, the shop I had bought it at did not carry it anymore, but I found a few websites that were still selling the design. Never mind that that one additional roll cost as much as the three other ones together. Lesson learned: never buy wallpaper on a whim when you only have a guesstimate of the actual room size!


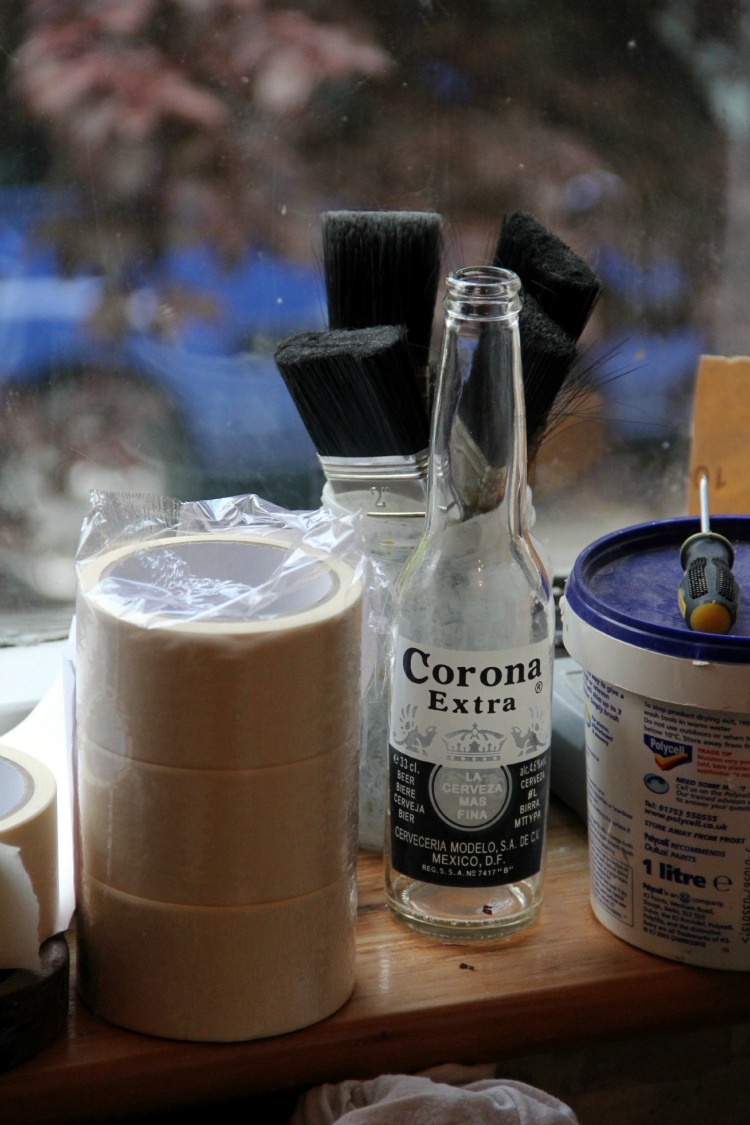
While I love a bit of DIY (when it does not drag on for months and months and months). my husband can only cope with it with the help of many a 
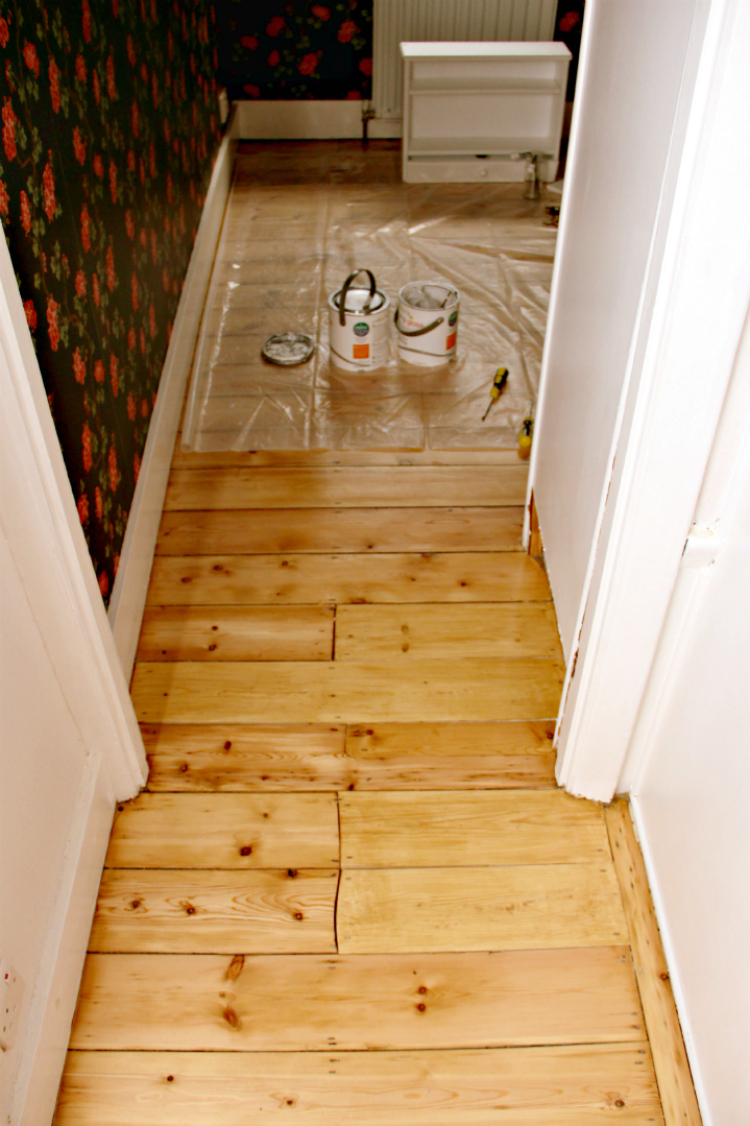
swear word and the occasional sip from a beer bottle! I am so grateful that he was willing to help with everything, though! Yesterday he spent his entire day off work sanding the floorboards after replacing a few faulty ones in my room and our upstairs hallway. Today he will do the same again, the magnificent man! He even cancelled drinks with his friend tonight to make sure he gets the job done. LOVE YOU!!!!


Apart from with my husband, I am also so in love with this room! I cannot wait to move all my things back in there and have a place for my laptop and my sewing machine and all my projects and ideas! I will keep you updated on the progress.


Photobucket

© Text & Photos - Annika - All The Live Long Day (unless otherwise stated).

Tuesday, 22 May 2012

Wedding Quilt


I personally thought this day would never come. Nor did the people who kept asking me about the quilt I had told them I would make about two years ago. The back story? I asked everybody at our wedding to bring a piece of fabric that I was going to make into a memory quilt to remind Marco and me of the day and of all the people that shared it with us.

So we got married, people gave me special fabrics, and then this fabric just sat around for nearly 24 months. I was kind of apprehensive to start on the quilt. It is going to be my first one, and I was so afraid of messing it up. But now I will tackle it! It is still daunting, especially as there are quite a few materials like silk and wool that you would probably normally not quilt with. But I have managed a few smaller patchwork projects over the past months, and succeeding with those have given me the confidence to start something bigger. So far, I have only taken photos to catalogue who gave us which fabric, and washed all the pieces so that the finished blanket will not shrink. And yay! All the fabric survived! I will keep you up to date on the progress. Wish me luck!

Canadian friends gave us fabric that they used for their furniture.
My grandparents gave me a piece of corduroy from dungarees I had as a child. 
My friend Saskia made a quilt block especially for us.
My uncle (via my Mama) donated a piece of my old room's curtains.
My colleague and his wife gave us a Chinese silken handkerchief.
This is a fragment of a skirt my Mama made me when I was little.
My friend Susi brought a piece of window decorating fabric from the bookshop that we used to work at together.
Our friend John once made this batique that should have become a cushion but will no go in the quilt.

My aunt surprised us with a fabric remnant of the dress that she wore as a bridesmaid at my parent's wedding.
My friend Abi parted with a whole thoughtful collection that included her son's first hat.

Now I cannot wait to cut squares out of all these!

Photobucket

© Text & Photos - Annika - All The Live Long Day (unless otherwise stated).

Thursday, 17 May 2012

Look! I can make curtains!


But hey, at least I finally got around to sewing some curtains for the living room! It was one of those projects that had been on my to-do list forever. It was really quick to do in the end, maybe a couple of hours.

I used a set of old sheets that I got from eBay, and cut in half the yellow sheet was about the right width to cover the window. So I could use the existing hems, which saved me a lot of work. Lengthwise, the sheet did not quite fit, but as I wanted a contrasting bottom anyway, that was not to much of a drawback. I cut strips of the other sheet with a floral pattern in matching colours and sewed them on, using the French seam technique for a neat finish, so that my neighbours don't have to look at untidy sewing when they pass by my house. Again, I made use of the existing hem, and did not have to hem the bottom edge myself.

French Seam
I did not like how, when the light fell through the curtains, you could see where the hem started, so I attached a length of jaquard trim over it. Even though this was not part of my initial plan, I very much liked the look of it.

And here are my new curtains, all done. I like how they are not too dark and still let some of the light shine through. The cats have already started hairing all over them, so I think they approve. And even Marco liked them, despite the floral pattern at the bottom! That has made me think that I might try and be able to sneak some more flowery stuff into our home... Shhhh!

Photobucket

© Text & Photos - Annika - All The Live Long Day (unless otherwise stated).

Monday, 5 March 2012

Embroidered Wedding Date - Tutorial


One of my workmates got married on the weekend. He was still at work late Friday afternoon, being his helpful self, sorting out problems that other people had caused while ordering flowers and nipping out to purchase cufflinks. One of the people he was helping was me, as I had made a bit of a mess of a piece of routine work. So I made him and his wife this little wall hanging as a thank you for being awesome and to celebrate their wedding date.


What you will need to make a similar gift:

4" (10cm) embroidery hoop
washi tape
piece of fabric to fit the hoop
water soluble fabric marker
embroidery needle
two colours of embroidery thread (I used Anchor266 and DMC3809)
small piece of waste canvas
double-sided tape
cardboard
pencil
glue stick
paper scissors
yarn scissors
pinking shears


First, I wrapped the outer piece of the embroidery hoop with washi tape. As I was going to be using the hoop as a frame for the finished work, this made it look pretty and also holds the fabric in place.


I trimmed the piece of fabric to size with pinking shears and placed it in the hoop. You can use regular fabric scissors, but pinking the edges will keep them from fraying. I then used the water soluble marker to draw a circle, which helped me place the names of the couple and the date. I wrote the names and the wedding date along the lines of the circle. I practised on a piece of paper first, until I liked the way the lettering looked.
I then embroidered along the lines of the letters and numbers in back stitch, making sure the stitches were roughly the same length. After I was done, I basted my piece of waste canvas onto the middle and cross stitched a simple heart design over three threads of the waste canvas, making the crosses slightly larger than usual. In order to determine where to place the heart, I held the frame against the light to see where the middle of the design was.


Once done stitching the heart, I carefully trimmed the waste canvas around the design and removed the threads one by one. You can use tweezers for this if it appears too fiddly.

I then took the finished embroidery out of the hoop and used a clean, lint free cloth that I dampened with cold water to remove the marker for the fabric. It is enough to dab the lines, but you could also rinse out the whole piece.


I let the fabric dry and then placed it back in the hoop. I trimmed it all around to a length that gave me an overhang of about 1cm, using the pinking shears. I attached a length of double sided tape all along the inside rim of the hoop, removed the backing and folded the edge of the fabric over to the inside to secure.


This is what the hoop looked like from the back after I was finished. I then used a pencil and traced very lightly around the outside of the hoop on a piece of cardboard. This was going to be the backing for my wall hanging. 
I cut the circle out just inside the lines and used a glue stick to secure the cardboard to the back of the hoop. I also glued on a paper doily with a message for the couple, but whether or not you would like to do the same is up to you. I attached a pretty ribbon to the screw and then I was done!

I hope this tutorial was okay to understand. Let me know if you make your own little gift for somebody! It doesn't have to be for a wedding, you could also give it to somebody to commemorate the birth if a child or embroider the names of you and a friend? I am sure you could come up with all different kinds of ideas!


Photobucket

© Text & Photos - Annika - All The Live Long Day (unless otherwise stated).
 
lollipops