Showing posts with label Wedding. Show all posts

Saturday, 30 August 2014

Then & Now - 2014


A bit blurry, as it's been taken with a phone, but happy 4th wedding anniversary to us!


Photobucket
© Text & Photos - Annika - All The Live Long Day (unless otherwise stated).

Thursday, 6 September 2012

Then & Now - 2012


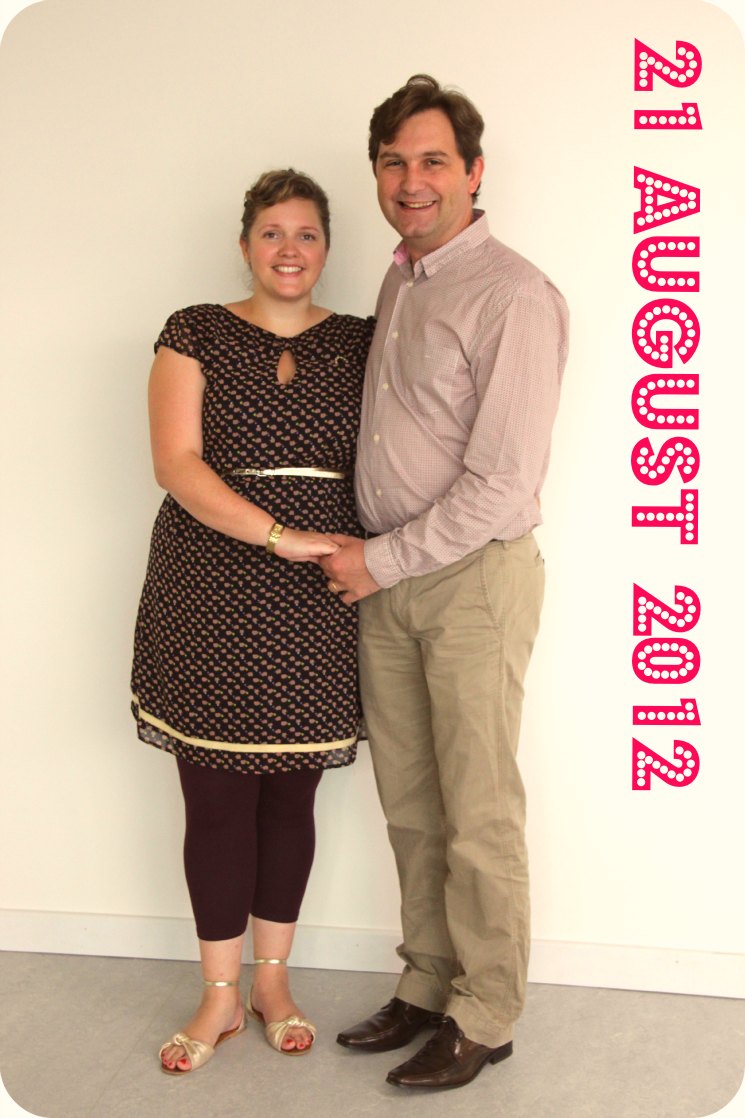
It was fun to take a then-and-now picture on our first wedding anniversary last year, so we did it again for our second! I wonder if I will still love wearing leggings next year and if Marco will be dressed in a shirt again. He's a t-shirt kinda guy, normally. 

I do know that I love my husband very much, that's for sure!


Photobucket
 
© Text & Photos - Annika - All The Live Long Day (unless otherwise stated).
 

Tuesday, 21 August 2012

Time Flies When You're Having Fun!


 Photobucket
 
© Text & Photos - Annika - All The Live Long Day (unless otherwise stated).

Tuesday, 22 May 2012

Wedding Quilt


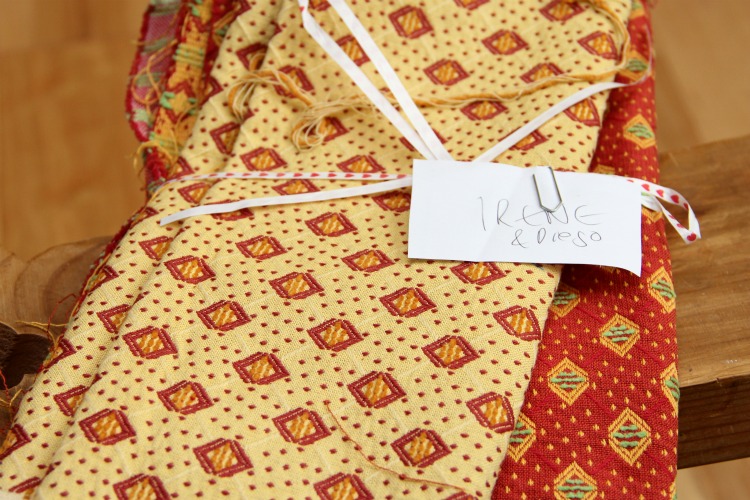
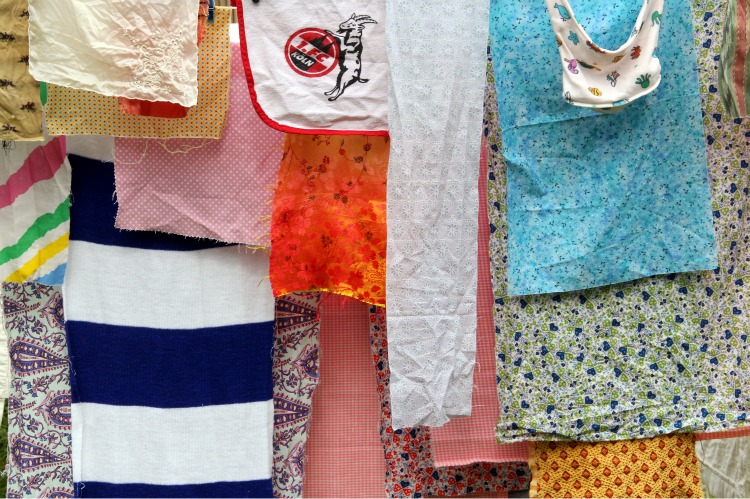
I personally thought this day would never come. Nor did the people who kept asking me about the quilt I had told them I would make about two years ago. The back story? I asked everybody at our wedding to bring a piece of fabric that I was going to make into a memory quilt to remind Marco and me of the day and of all the people that shared it with us.

So we got married, people gave me special fabrics, and then this fabric just sat around for nearly 24 months. I was kind of apprehensive to start on the quilt. It is going to be my first one, and I was so afraid of messing it up. But now I will tackle it! It is still daunting, especially as there are quite a few materials like silk and wool that you would probably normally not quilt with. But I have managed a few smaller patchwork projects over the past months, and succeeding with those have given me the confidence to start something bigger. So far, I have only taken photos to catalogue who gave us which fabric, and washed all the pieces so that the finished blanket will not shrink. And yay! All the fabric survived! I will keep you up to date on the progress. Wish me luck!

Canadian friends gave us fabric that they used for their furniture.
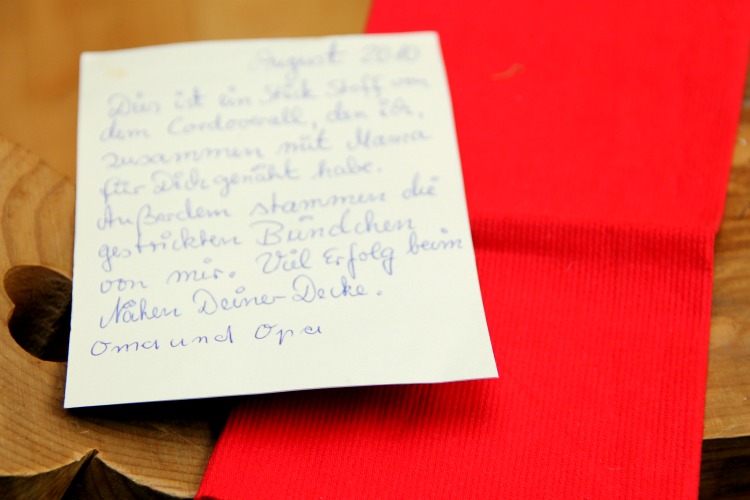
My grandparents gave me a piece of corduroy from dungarees I had as a child. 
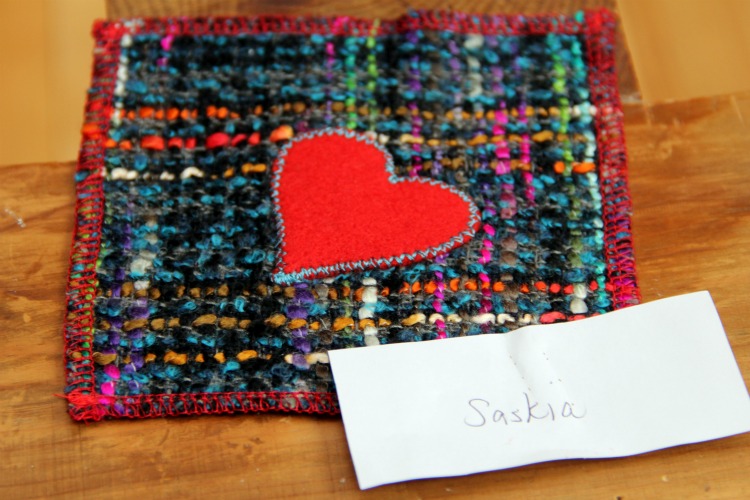
My friend Saskia made a quilt block especially for us.
My uncle (via my Mama) donated a piece of my old room's curtains.
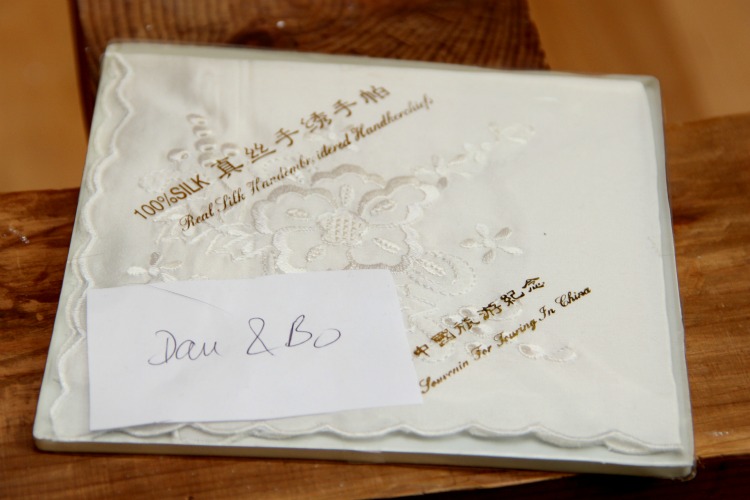
My colleague and his wife gave us a Chinese silken handkerchief.
This is a fragment of a skirt my Mama made me when I was little.
My friend Susi brought a piece of window decorating fabric from the bookshop that we used to work at together.
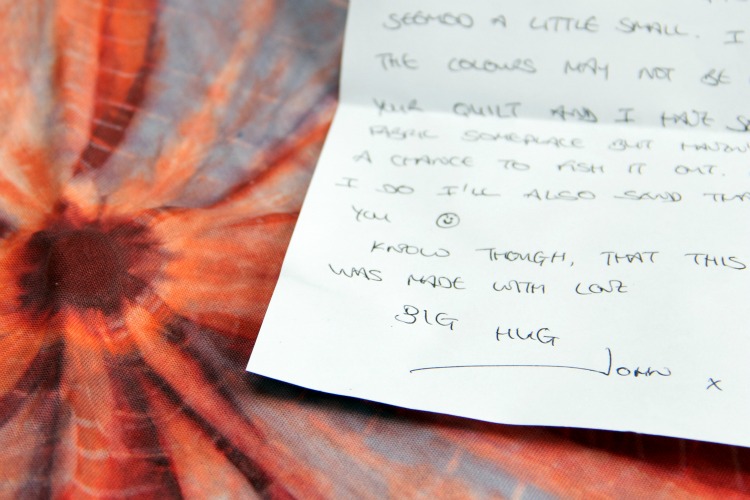
Our friend John once made this batique that should have become a cushion but will no go in the quilt.

My aunt surprised us with a fabric remnant of the dress that she wore as a bridesmaid at my parent's wedding.
My friend Abi parted with a whole thoughtful collection that included her son's first hat.

Now I cannot wait to cut squares out of all these!

Photobucket

© Text & Photos - Annika - All The Live Long Day (unless otherwise stated).

Monday, 5 March 2012

Embroidered Wedding Date - Tutorial


One of my workmates got married on the weekend. He was still at work late Friday afternoon, being his helpful self, sorting out problems that other people had caused while ordering flowers and nipping out to purchase cufflinks. One of the people he was helping was me, as I had made a bit of a mess of a piece of routine work. So I made him and his wife this little wall hanging as a thank you for being awesome and to celebrate their wedding date.


What you will need to make a similar gift:

4" (10cm) embroidery hoop
washi tape
piece of fabric to fit the hoop
water soluble fabric marker
embroidery needle
two colours of embroidery thread (I used Anchor266 and DMC3809)
small piece of waste canvas
double-sided tape
cardboard
pencil
glue stick
paper scissors
yarn scissors
pinking shears


First, I wrapped the outer piece of the embroidery hoop with washi tape. As I was going to be using the hoop as a frame for the finished work, this made it look pretty and also holds the fabric in place.


I trimmed the piece of fabric to size with pinking shears and placed it in the hoop. You can use regular fabric scissors, but pinking the edges will keep them from fraying. I then used the water soluble marker to draw a circle, which helped me place the names of the couple and the date. I wrote the names and the wedding date along the lines of the circle. I practised on a piece of paper first, until I liked the way the lettering looked.
I then embroidered along the lines of the letters and numbers in back stitch, making sure the stitches were roughly the same length. After I was done, I basted my piece of waste canvas onto the middle and cross stitched a simple heart design over three threads of the waste canvas, making the crosses slightly larger than usual. In order to determine where to place the heart, I held the frame against the light to see where the middle of the design was.


Once done stitching the heart, I carefully trimmed the waste canvas around the design and removed the threads one by one. You can use tweezers for this if it appears too fiddly.

I then took the finished embroidery out of the hoop and used a clean, lint free cloth that I dampened with cold water to remove the marker for the fabric. It is enough to dab the lines, but you could also rinse out the whole piece.


I let the fabric dry and then placed it back in the hoop. I trimmed it all around to a length that gave me an overhang of about 1cm, using the pinking shears. I attached a length of double sided tape all along the inside rim of the hoop, removed the backing and folded the edge of the fabric over to the inside to secure.


This is what the hoop looked like from the back after I was finished. I then used a pencil and traced very lightly around the outside of the hoop on a piece of cardboard. This was going to be the backing for my wall hanging. 
I cut the circle out just inside the lines and used a glue stick to secure the cardboard to the back of the hoop. I also glued on a paper doily with a message for the couple, but whether or not you would like to do the same is up to you. I attached a pretty ribbon to the screw and then I was done!

I hope this tutorial was okay to understand. Let me know if you make your own little gift for somebody! It doesn't have to be for a wedding, you could also give it to somebody to commemorate the birth if a child or embroider the names of you and a friend? I am sure you could come up with all different kinds of ideas!


Photobucket

© Text & Photos - Annika - All The Live Long Day (unless otherwise stated).
 
lollipops

Monday, 5 September 2011

I Am Guest Posting At "The Corner Of The Internet I Call Home" Today


The Corner Of The Internet I Call Home belongs to Fiona, who's a fellow Londoner. I have been reading Fiona’s blog for a little while now and love her enthusiasm, her candour and her penchant for whimsy.

Fiona's been busy getting married  lately (woot, woot!), so has asked a few people to fill in for her while she is off celebrating. One of those people was me! 


If you like, pay Fiona a visit to check out what I wrote about the morning of my own wedding and to leave the newly-weds some congratulations!

Photobucket
© All The Live Long Day (unless otherwise stated)
 

Wednesday, 31 August 2011

Then & Now


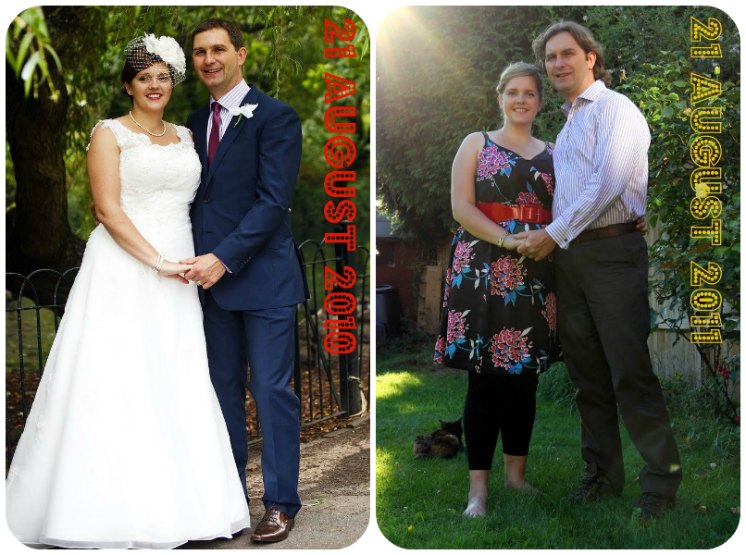
Look! It's a Marco & Me double feature, with a year between photos! 

Just for fun, we took a picture of ourselves on our wedding anniversary, in one of the poses from the wedding shots. Somebody really let their hair down since getting married, eh? And I have apparently shrunk...


See how Mae snuck her little bum into this year's shot?!

Photobucket
© All The Live Long Day (unless otherwise stated)

Monday, 29 August 2011

Wedding Month Giveaway - The Winners


The True Random Number Generator has spoken and the winners of the wedding giveaway are:
 
Commenter number 3: Kim from Not Crazy, Just A Little...

 Commenter number 1: Fiona from The Corner Of The Internet I Call Home

Congratulations, you guys! I will be in touch!

Thank you to everybody else for commenting, I appreciate your thoughts and wish I had prizes for you all!

Photobucket
© All The Live Long Day (unless otherwise stated)

Friday, 19 August 2011

Wedding Month Giveaway!

THIS GIVEAWAY IS NOW CLOSED.


Hey, Wedding Month was nice! And it sure made the time pass quickly while I was waiting for Marco's and my first wedding anniversary, which will be on Sunday! We don't have anything extravagant planned, we will go out for lunch at a really cool restaurant to have some fancy food and probably to reminisce a lot about the wedding and our first year as husband and wife.

I can't promise you that I won't mention my wedding ever again, but for now I am looking forward to switching out of bridal mode and showing you what else I have been up to! 

So, thanks to everybody for your positive comments and for sticking around while I was waxing lyrical about love and marriage. I hope you enjoyed yourselves a bit, too.

And to thank you for your attendance I give you: THE WEDDING MONTH GIVEAWAY!

Up for grabs are:

one Tolsby frame
one vintage handkerchief
one cross stitch heart badge
one copy of John Berger's To The Wedding (my favourite wedding-related book)
one tote bag
a bundle of petite pencils
one CD with highlights from our wedding playlist

And I am giving away all of this not once, but twice. Yes, there will be two winners! Yay! One of you will win  all these items, and another one of you will win much of the same, just with a different colour hankie and bag. Deal? Okay! Check below the picture on how to enter.


Entry is open to anyone in the whole wide world. It would be fab if you were also a follower of my blog, but I won't shout at you if you aren't. To enter, leave a comment on this post, telling me what LOVE means to you.

For one additional entry, tell people about this giveaway on your blog. Leave me the link in a separate comment if you do, and that's that.

Please make sure that your email address is linked to your profile (or that you leave it in your comment), so that I have a means to contact you in case you win!

The giveaway will be open until Saturday, 27 August, 23:59 GMT. I will draw the two winners from all valid comments on the Sunday and announce them on Monday, 29 August. 

Good luck and have a lovely weekend!

Photobucket

© All The Live Long Day (unless otherwise stated)

How To Make A Paper Flower Boutonniere or Corsage


Inspired by Martha, I made boutonnieres and corsages for all members of our wedding party from tissue paper and wire. Let me show you how.


Need To Have:

cardboard
ruler
pencil
scissors
tissue paper
a ball-shaped object, ca. 3 cm in diameter
artificial stamens
green florist tape
florist stub wire (ca. 20 gauge)
wire pliers
some woody herbs (optional)
brooch pins


Need To Do:


First, make a 12.5 cm x 6 cm cardboard template. You will need this to cut out the petals to size.

For one flower, you will need 5 petals. Use your cardboard template and a pencil to draw 5 rectangles onto tissue paper in the colour of your choice. You can fold the paper into 5 layers if you like and cut out 5 petal shapes at once.


To form each petal, wrap your tissue paper halfway around a ball-shaped object. I used a little styrofoam ball for this, but you could also use a marble, a bouncing ball, or any other object that is about 3 cm in diameter. Twist the ends of the paper together like you were wrapping a piece of candy. Be quite delicate with this and careful not to rip the paper, but make sure that both ends are tightly twisted. Then carefully remove the ball.


After you have shaped each petal in this fashion, take one of the petals and about 8 - 12 of the articficial stamens and attach them to each other with florist tape. Add the petals one by one, until you end up with a flower shape. Don't worry if your flower looks a bit wonky at this stage, that can be rectified later.


Take a piece of stub wire and attach your flower to it, with the help of more florist tape. Cut the wire at the required length.

Cut off the twisty bits from the ends of your petals and arrange them in a nice blossom shape.


For our boutonnieres, I went out into the garden the day before the wedding and picked some rosemary, lavender and sage to attach to the paper flowers. I cut the herbs to the same length as the wire stem, stripped the lower leaves and attached them to the flower with the florist tape. this made the boutonnieres look more interesting and they also smelled really nice!

For the final step, take the brooch pin and attach it to the back of your creation, using the trusted florist tape. 

Et voilà! Your done!


Photobucket

P.S.: Keep your eyes peeled for the Wedding Month giveway. I will post the details later today!

© All The Live Long Day (unless otherwise stated)